Add an Image to an Event
Adding images to your event or calendar description is a great way to personalize your event or calendar and add additional information and context. Images will display inline in the event or calendar description on an event landing page, a calendar landing page, or any of the other sharing methods where the event or calendar description is visible.
Images won't be added to the event description when an end-user adds the event to their calendar. This is unfortunately a limitation of the calendar services we support and not something that we can implement until they decide to support it (rest assured that we'll add it as soon as we can).
How to add an image to your event description
From the Event page:
- Select the event you want to edit.
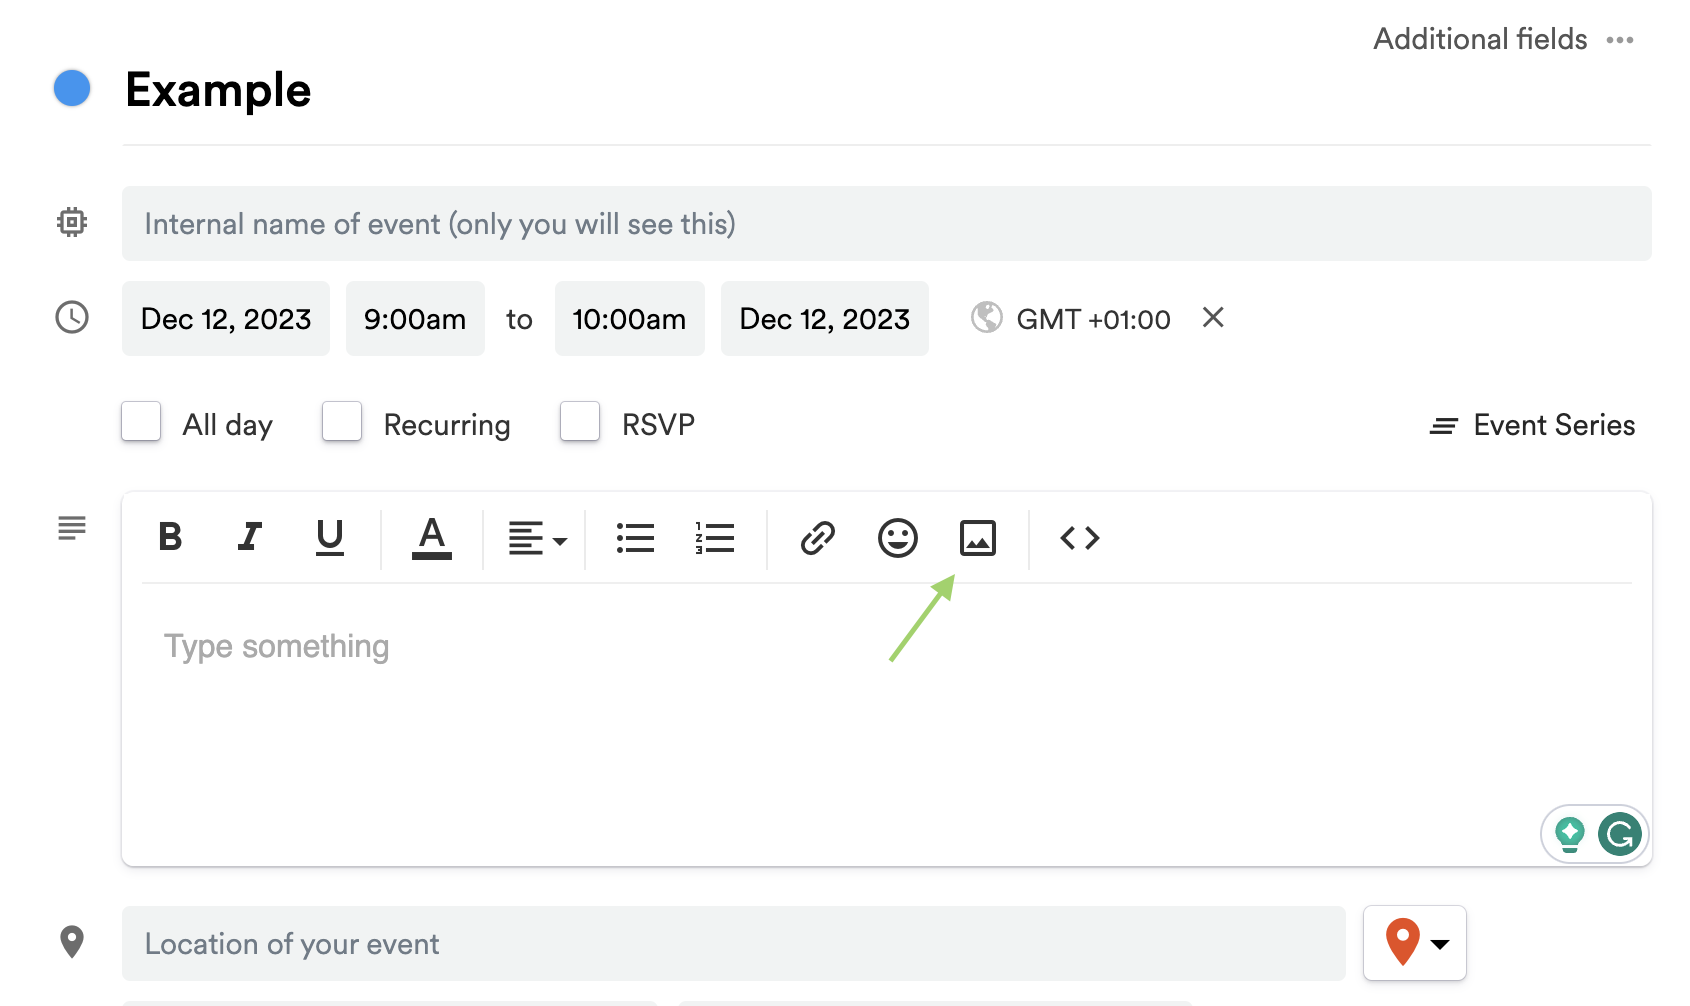
- From the event creation/editing flow, navigate to the event description section and click the image icon to open the image uploader.
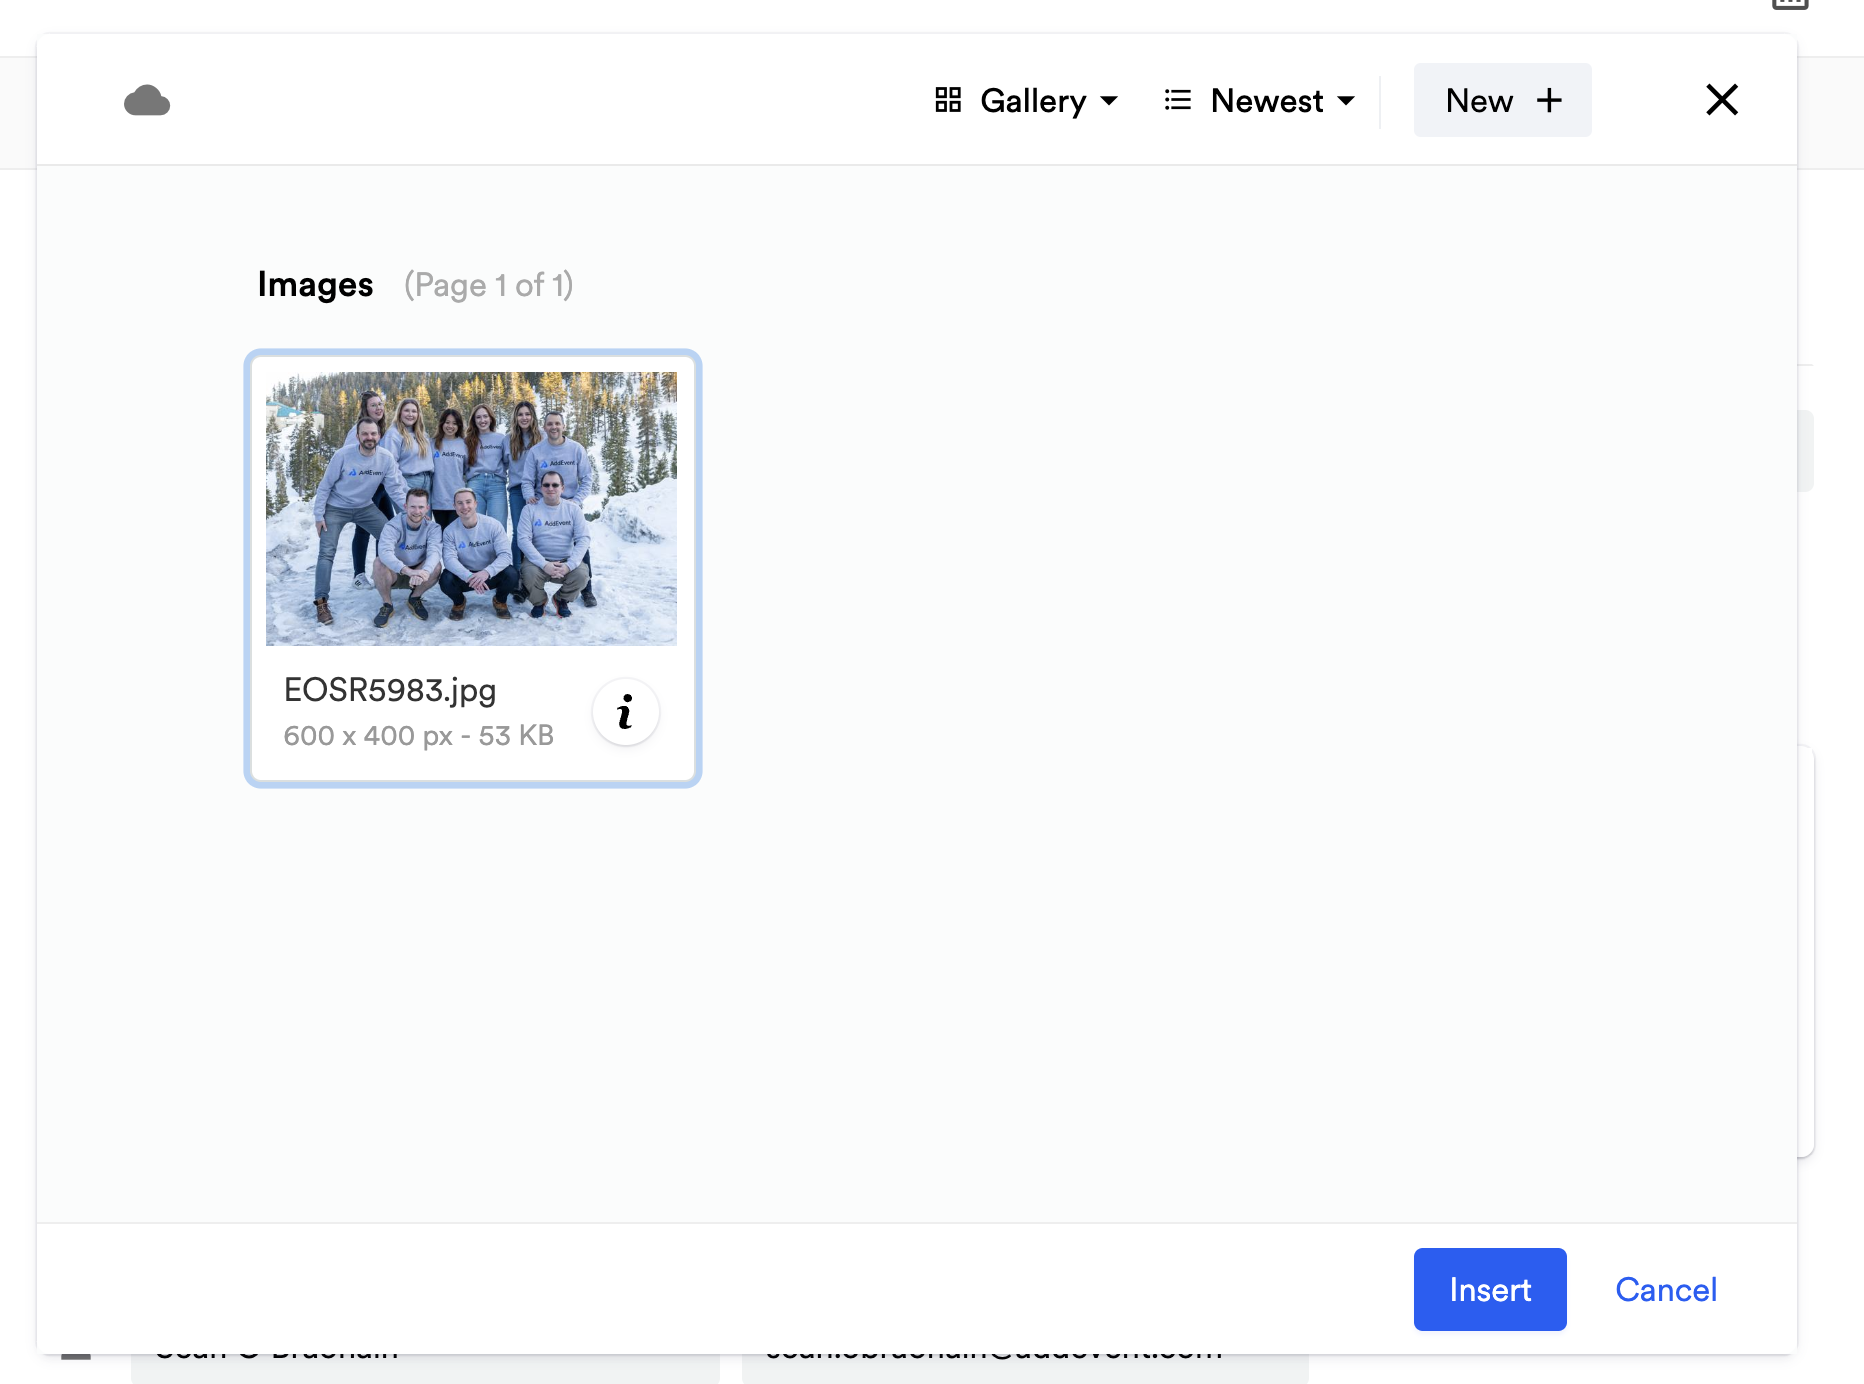
- If you have no images uploaded already, you will need to upload a new image. To upload an image, click New > Image, and then you can either click the Upload an Image button to browse the files on your computer or drag & drop an image directly onto the pop-up. As soon as the image is finished uploading, click Continue.
- From the image manager, select the image that you want to use, and click Insert.
- Once the image is inserted, you can resize the image, add alt-text, insert a hyperlink, or remove the image from the description.
- Click Save/Create at the bottom of the page to save or create your event! To view the image in the event description, go to the event landing page.
How to add an image to your calendar description
From the dashboard:
- Create a new calendar (or edit an existing calendar by hovering over the calendar name, clicking the three dots that appear, and clicking Edit).
- From the calendar creation/editing flow, navigate to the calendar description section and select the Image icon to open the image uploader.
- Follow steps 3-5 above in the "How to add an image to your event description" section.
- Click Save/Create at the bottom of the page to save or create your calendar! To view the image in the calendar description, go to the calendar landing page.
Updated 5 months ago