Landing Page Links for Events
This help doc explains the function of the event landing page and how you can share it with your users. An event landing page is where your users see the details of the event and have the ability to RSVP and add the event to their calendars. Once you've created an event, you will be able to view the event landing page.
Event Landing Page
From the Event page:
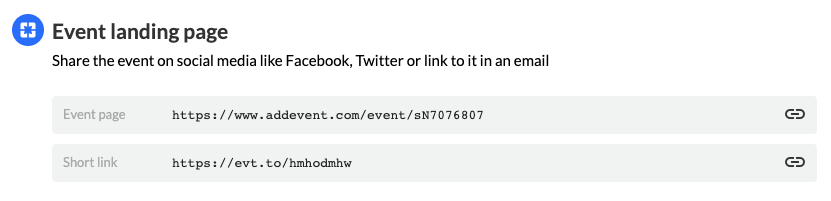
- Scroll down to the Event landing page section (see image below).
- You will find two URLs, one generic link and one short link. Each event you create has a unique landing page that is used for sharing the event. The landing page is automatically generated when the event is created.
Follow the steps below to share your event landing page:
- Highlight and copy the link you want to share.
- Paste the link in a text message, email, Twitter, Facebook, or hyperlink text in a PDF file. You can share this link with your attendees however you would like.
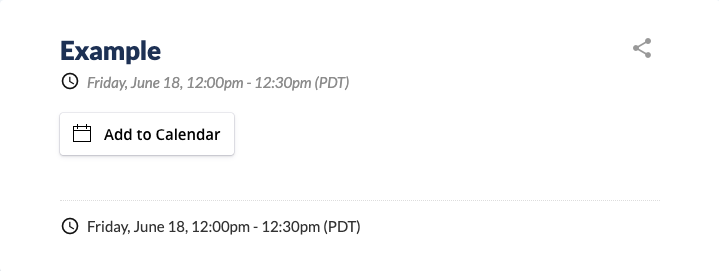
- When your attendees click the link, they’ll be taken to the event landing page, shown in the image below, from which they can add the event to their calendars.
You can create custom landing pages for your events, or you can use the Standard template landing page provided by AddEvent. On the event creation page, you can select which template you wish to use for the landing page.
Updated 5 months ago