Change the Language of an Event or RSVP Landing Page
This help doc explains how to create a custom template for your event landing pages for events with and without being RSVP-enabled or a recurring event.
Creating a Template
-
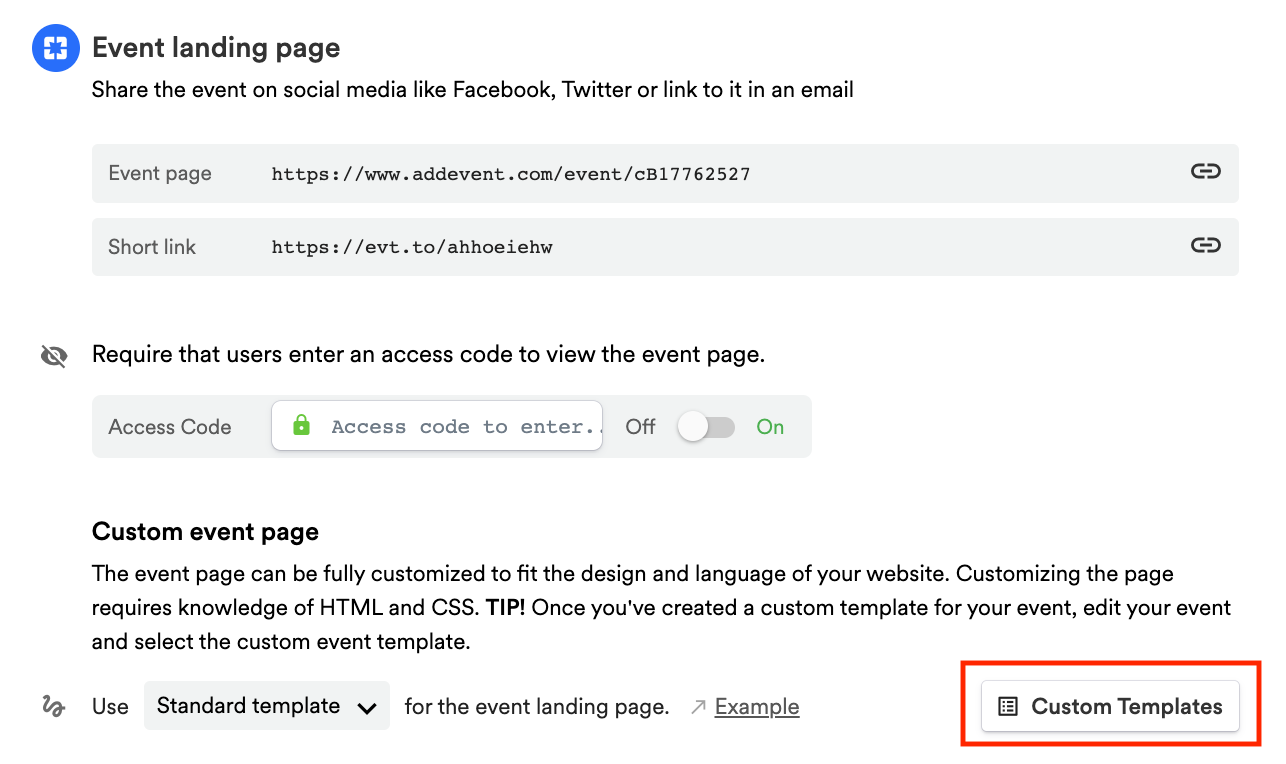
Scroll down to the first sharing method, Event landing page. Create a custom event landing page template by clicking Custom Templates in the app and clicking + New Template. Add a name for the template.
Changing the Language
The first six steps are what you will need to update for an event without RSVP. If you are updating the language for an event that is RSVP-enabled, continue through all the steps in this help doc.
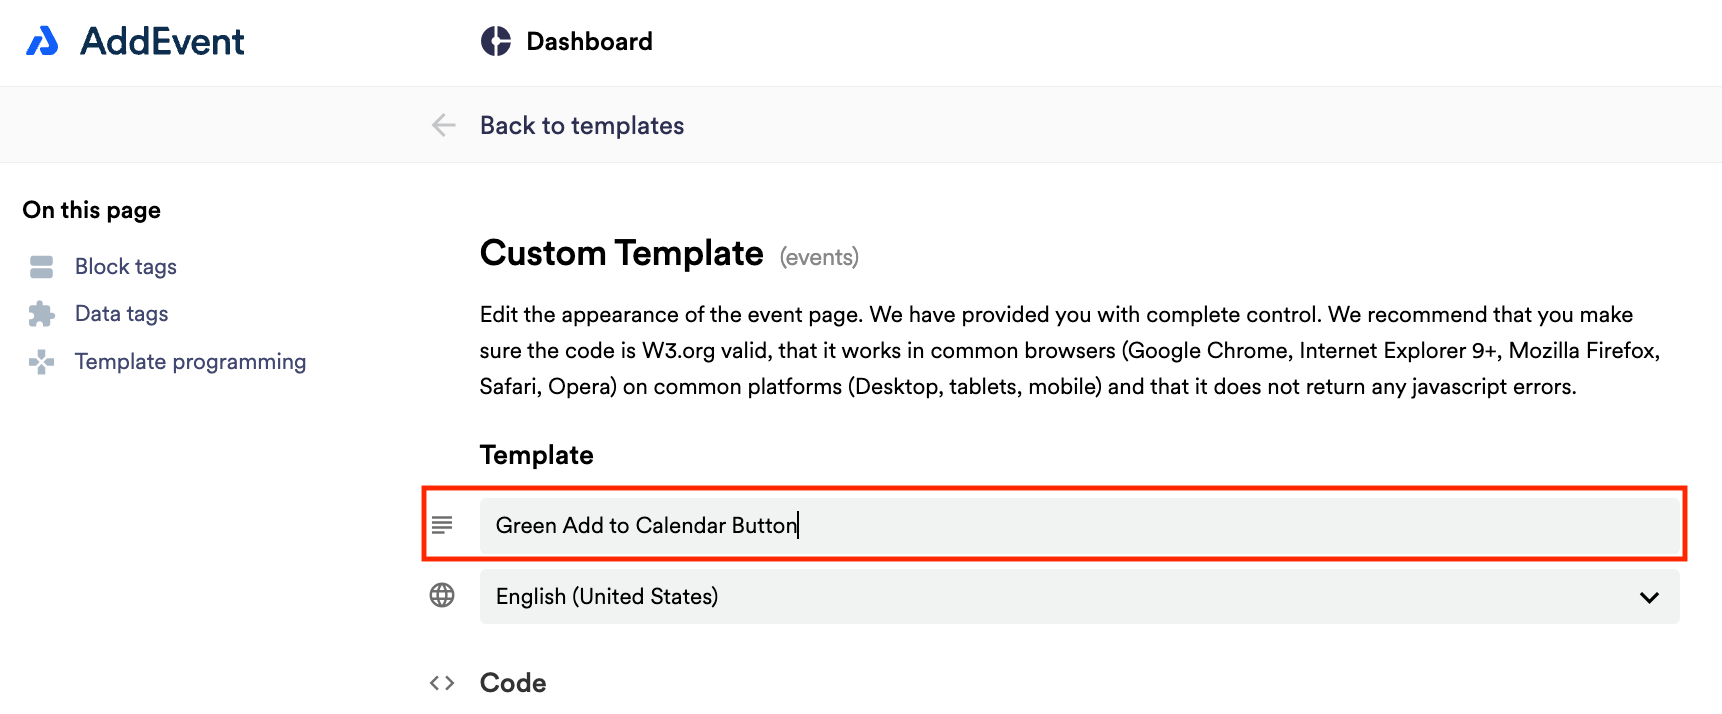
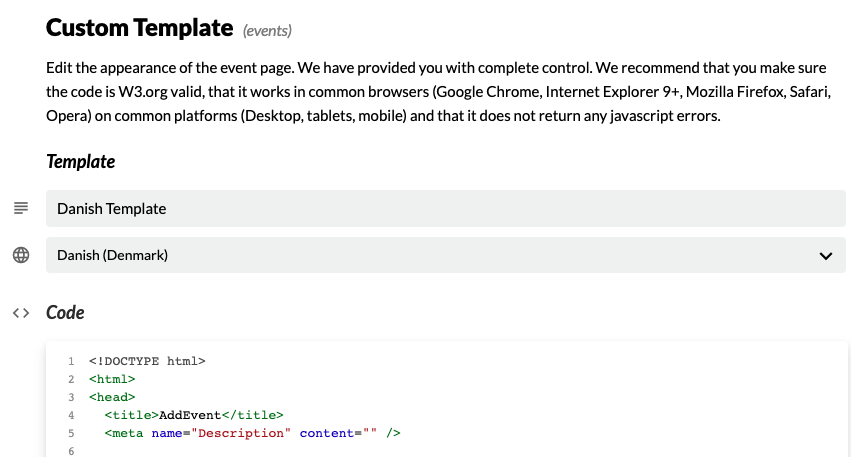
- Enter a template name and select a language from the drop-down menu in the second gray box.
- This will change the language of the date-time format. Once the language is selected, we need to change the actual text parts of the template.
To edit the text values in the template, we need to replace the block tags with the corresponding code snippets and then change the needed strings.
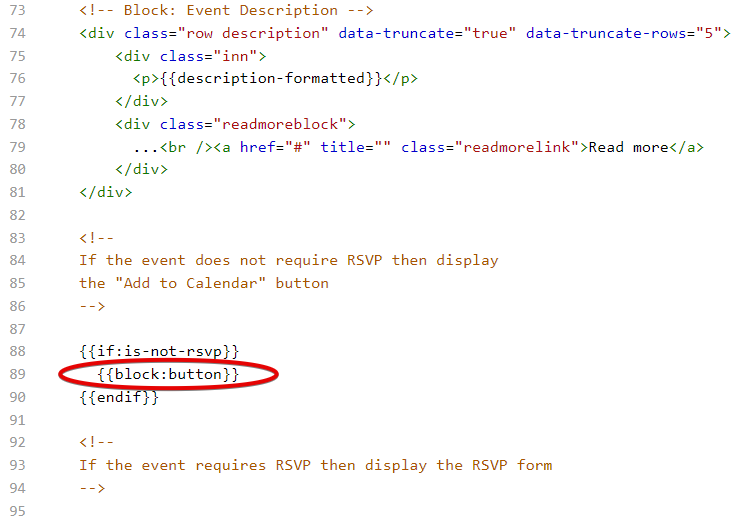
- Let's start with the event description. You need to find the block tag,
{{block:description}}, and replace it with the corresponding code snippet from the Block tags part of the page below the Code section. - Next, you must change the Read more text to the counterpart in your needed language. Below is a screenshot showing the location of the block tag in the template code and a screenshot showing the code snippet that will replace the block tag
{{block:description}} - Once you've replaced the block tag with the code snippet and changed Read more to the needed text, you can proceed to the next step.
<div class="row description" data-truncate="true" data-truncate-rows="5"> <div class="inn"> <p>{{description-formatted)}</p> </div> <div class="readmoreblock"> ...<br /><a href="#" title="" class="readmorelink">Read more</a> </div> </div> - Once you've replaced the block tag with the code snippet and changed Read more to the needed text, you can proceed to the next step.
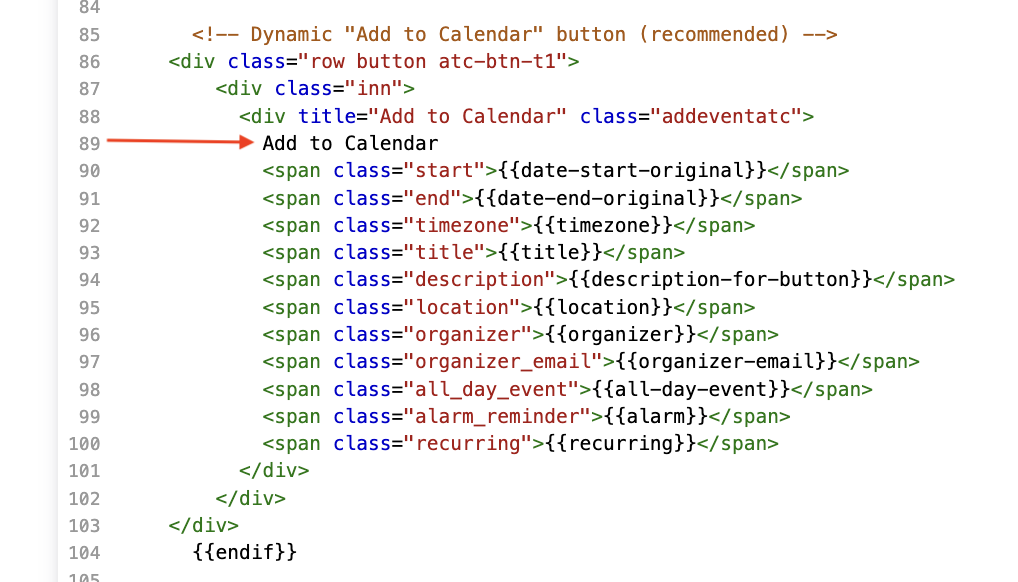
- Now, you can change the add to calendar button text. For that, find the line with the
{{block:button}}block tag and just like the previous step, replace it with the corresponding code snippet:<!-- Dynamic "Add to Calendar" button (recommended) --> <div class="row button atc-btn-t1"> <div class="inn"> <div title="Add to Calendar" class="addeventatc"> Add to Calendar <span class="start">{{date-start-original}}</span> <span class="end">{{date-end-original}}</span> <span class="timezone">{{timezone}}</span> <span class="title">{{title}}</span> <span class="description">{{description-for-button}}</span> <span class="location">{{location}}</span> <span class="organizer">{{organizer}}</span> <span class="organizer_email">{{organizer-email}}</span> <span class="all_day_event">{{all-day-event}}</span> <span class="alarm_reminder">{{alarm}}</span> <span class="recurring">{{recurring}}</span> </div> </div> </div>
- Within the code block, you need to change the add to calendar text to the needed language. Once this is done, the basic translation of the page is complete. If your event isn't RSVP-enabled - you can proceed with saving the template (please check Saving and Applying the template section).
Customize the template for RSVP
Please continue with these steps if you have the event RSVP-enabled.
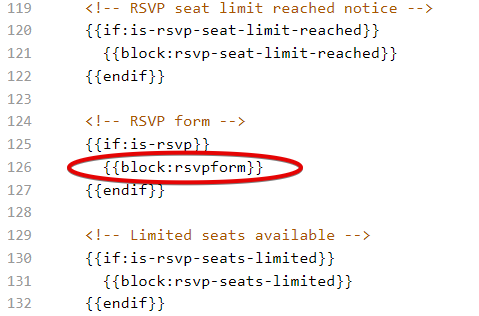
- Please find
{{block:rsvpform}}block-tag in the template code:
-
Please replace this block tag with the corresponding code from the Block tags section:
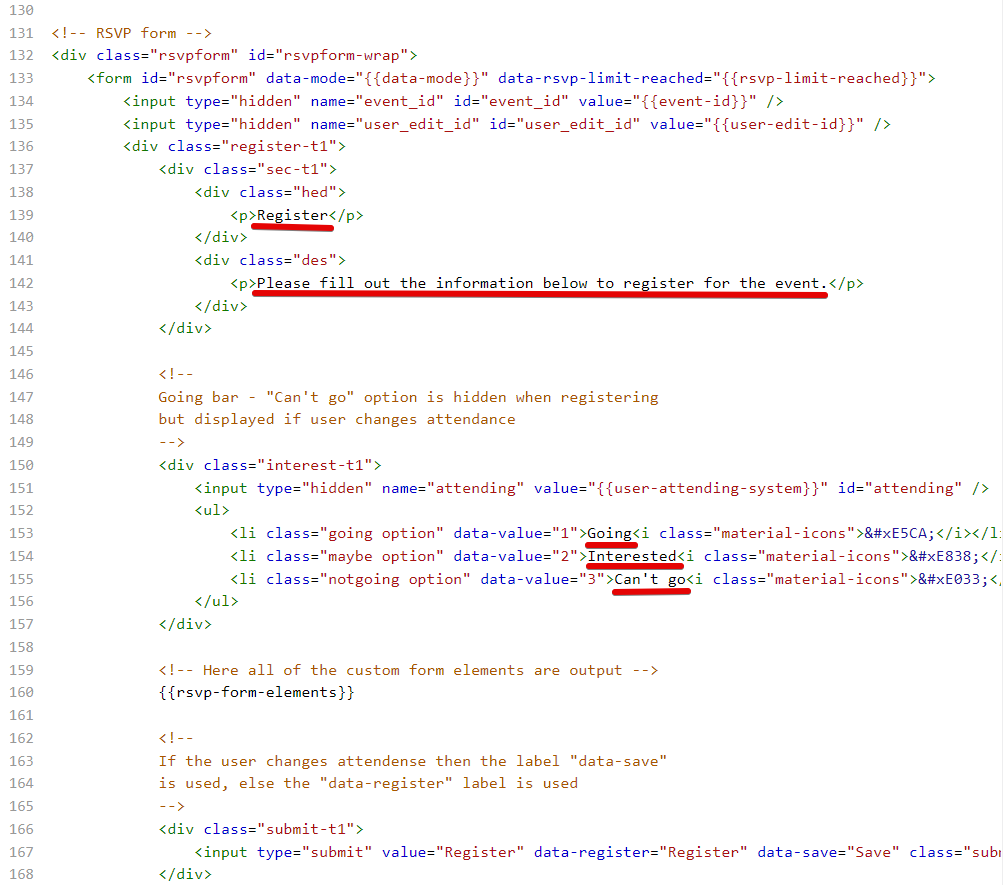
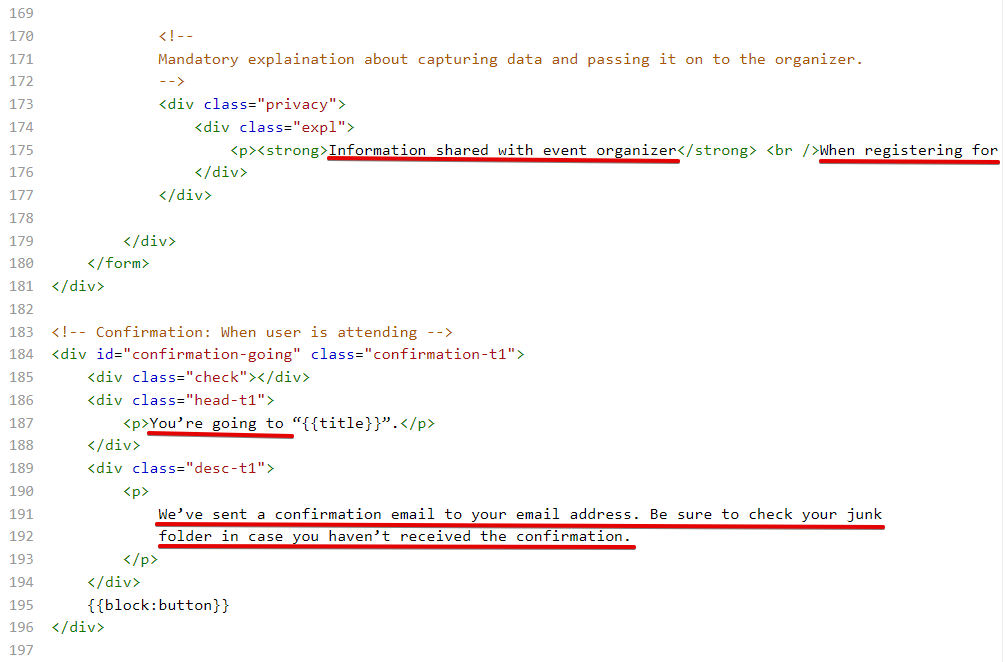
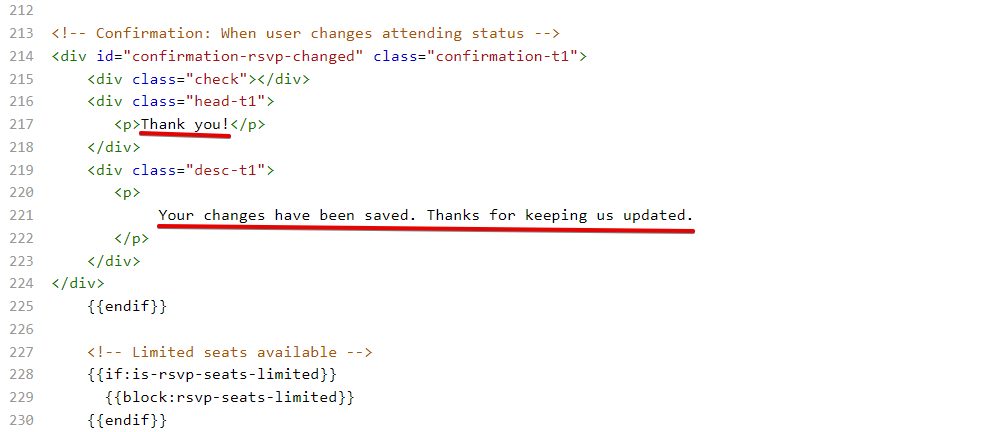
<!-- Register button is used if event requires RSVP --> <div class="button-register-t1"> <input type="button" value="Respond" class="buttonregister" /> </div> <!-- RSVP form --> <div class="rsvpform" id="rsvpform-wrap"> <form id="rsvpform" data-mode="{{data-mode}}" data-rsvp-limit-reached="{{rsvp-limit-reached}}"> <input type="hidden" name="event_id" id="event_id" value="{{event-id}}" /> <input type="hidden" name="user_edit_id" id="user_edit_id" value="{{user-edit-id}}" /> <div class="register-t1"> <div class="sec-t1"> <div class="hed"> <p>Register</p> </div> <div class="des"> <p>Please fill out the information below to register for the event.</p> </div> </div> <!-- Going bar - "Can't go" option is hidden when registering but displayed if user changes attendance --> <div class="interest-t1"> <input type="hidden" name="attending" value="{{user-attending-system}}" id="attending" /> <ul> <li class="going option" data-value="1">Going<i class="material-icons"></i></li> <li class="maybe option" data-value="2">Interested<i class="material-icons"></i></li> <li class="notgoing option" data-value="3">Can't go<i class="material-icons"></i></li> </ul> </div> <!-- Here all of the custom form elements are output --> {{rsvp-form-elements}} <!-- If the user changes attendense then the label "data-save" is used, else the "data-register" label is used --> <div class="submit-t1"> <input type="submit" value="Register" data-register="Register" data-save="Save" class="submit" /> </div> <!-- Mandatory explaination about capturing data and passing it on to the organizer. --> <div class="privacy"> <div class="expl"> <p><strong>Information shared with event organizer</strong> <br />When registering for this event, we provide the information entered to the event organizer so they can manage the event. If you do not want the event organizer to have this information, please do not proceed with your registration. Please review our <a href="/privacy" title="" target="_blank">Privacy Policy</a>.</p> </div> </div> </div> </form> </div> <!-- Confirmation: When user is attending --> <div id="confirmation-going" class="confirmation-t1"> <div class="check"></div> <div class="head-t1"> <p>You’re going to “{{title}}”.</p> </div> <div class="desc-t1"> <p> We’ve sent a confirmation email to your email address. Be sure to check your junk folder in case you haven’t received the confirmation. </p> </div> {{block:button}} </div> <!-- Confirmation: When user is interested --> <div id="confirmation-interested" class="confirmation-t1"> <div class="check"></div> <div class="head-t1"> <p>You’re interested in “{{title}}”.</p> </div> <div class="desc-t1"> <p> We’ve sent a confirmation email to your email address. Be sure to check your junk folder in case you haven’t received the confirmation. </p> </div> {{block:button}} </div> <!-- Confirmation: When user changes attending status --> <div id="confirmation-rsvp-changed" class="confirmation-t1"> <div class="check"></div> <div class="head-t1"> <p>Thank you!</p> </div> <div class="desc-t1"> <p> Your changes have been saved. Thanks for keeping us updated. </p> </div> </div> -
Once the code is replaced, you need to translate the text marked with red:
Recurring Event Rules
When you share a landing page for an event with a recurring rule, we add a short text explanation of the rule to the landing page, next to the date and time. By default, that explanation text is in English, but we also support translating the text into 12 different languages based on the language setting of the custom landing page template.
To update the language of the recurring rule explanation text (and also update the date and time format of the event), simply follow these steps:
- Create an event with a recurring rule. Click on the Event in the dashboard and open the Event Detail page.
- Scroll down to the Event landing page section and click Custom templates on the right hand side underneath the Custom event page heading.
- On the event landing page templates page, click + New template.
- Choose a language from the dropdown. See below for a list of languages that support the recurring rule explanation text translation.
- Add a template name, then click Create at the bottom of the template file.
- The last thing to do is to apply your new template to your event landing page. Go back to the event page, and scroll down to the Event landing page section again. Click the dropdown that says Standard template, choose the template you just created, and click Set.
- To preview your event landing page, simply click the link for the event landing page to open it in a new tab.
Supported Languages
The following languages are currently supported to translate the recurring rule explanation text:
- English (EN)
- German (DE)
- Spanish (ES)
- Persian (FA)
- Finnish (FI)
- French (FR
- Hebrew (HE)
- Italy (IT)
- Dutch (NE)
- Polish (PL)
- Portuguese (PT)
- Swedish (SV)
Apply the template
Once all the needed changes are made, please follow these steps to save the custom template and apply it to your event:
- To save the template, click Create underneath the code box at the top of the page.
- Click Back to templates at the top left of the page.
- Scroll down to Custom event page and use the drop-down menu to select the custom template you've created, and click Set.
- When you view your event landing page, you will now see it in the language you have selected.
Watch this tutorial!
Updated 4 months ago