Create and share your first event
First things first, welcome to AddEvent! We’re thrilled to have you. Let's walk through how you can use one of our most popular tools: creating and sharing events. AddEvent allows you to easily share your events and keep your guests in the loop, increasing your event attendance! To get started, feel free to open a new window so you can follow along with the video below or follow the steps in this doc to create an event.
Creating an event
You will start on your Dashboard, and from the Dashboard, there are two different ways to create a new event:
- Click Create on the upper left part of the Dashboard and select Event.
- Or, click on the day in the calendar on which the event will occur and select More options.
Once you've completed either of the options above, you'll be taken to the Event Creation Page (see image below). From here, you can customize all of the event details. You can click here for a detailed outline of all the event details.
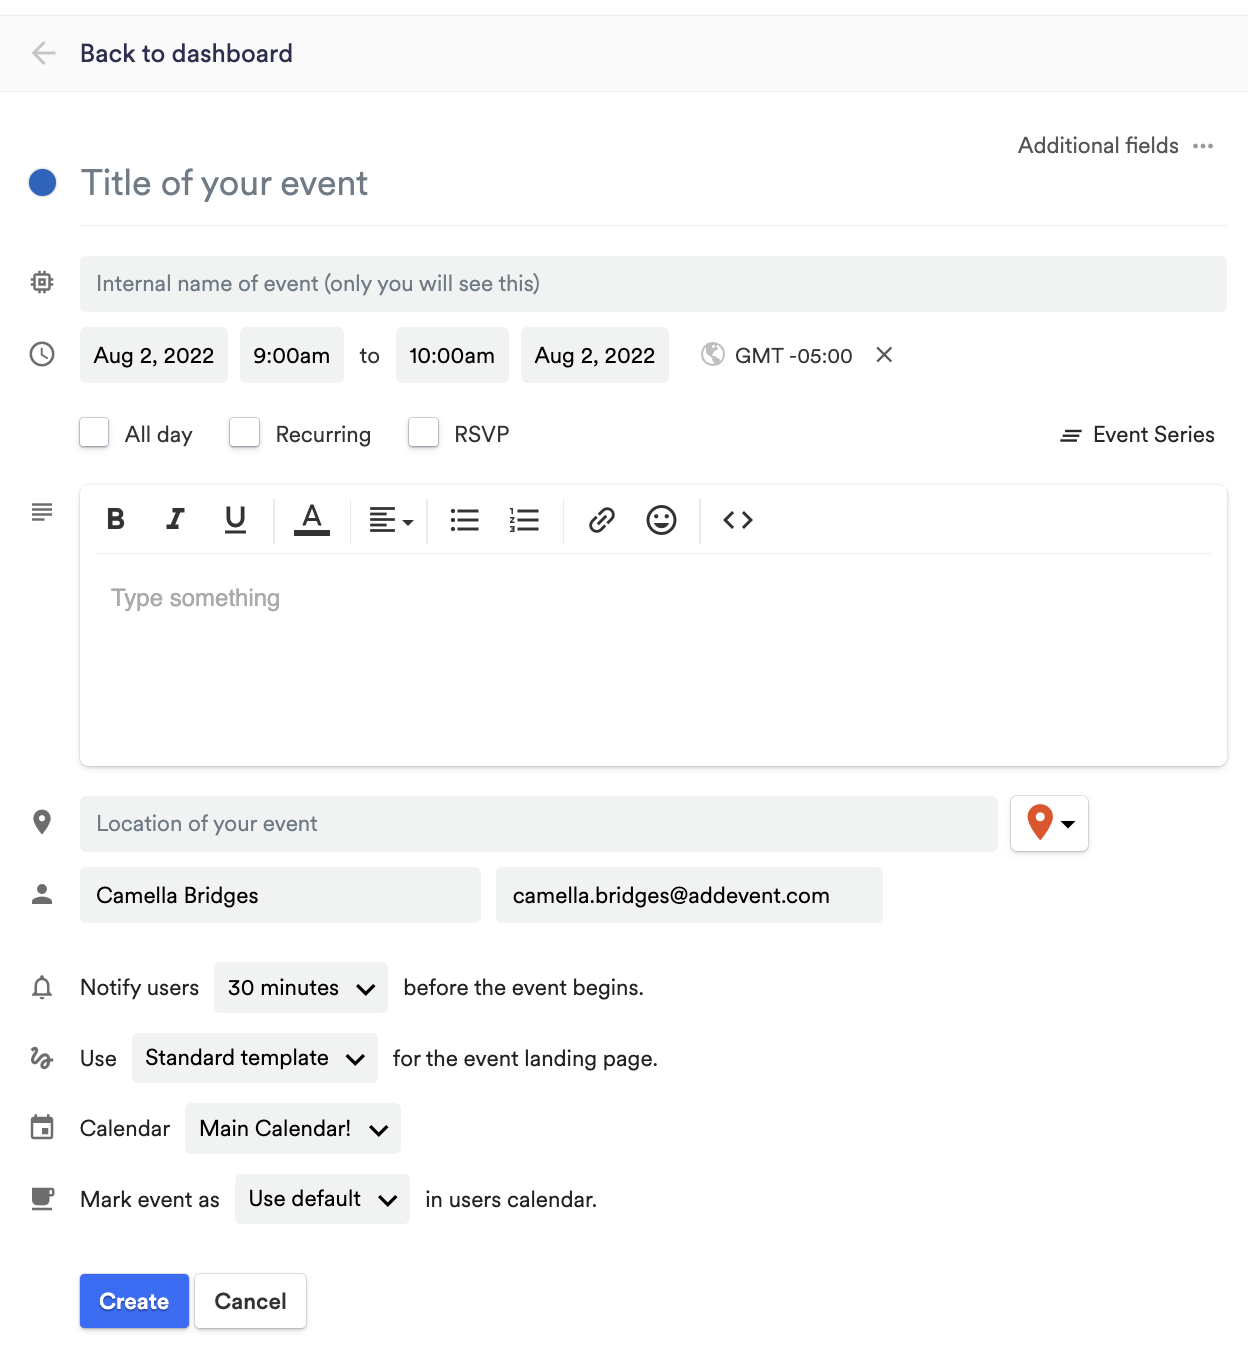
After filling in the essential details, hit the Create button. This is where the magic happens, and you get to share the event with your audience from the event page!
Sharing your event
Now let's go over the three different sharing methods AddEvent offers! All of the sharing methods are outlined below.
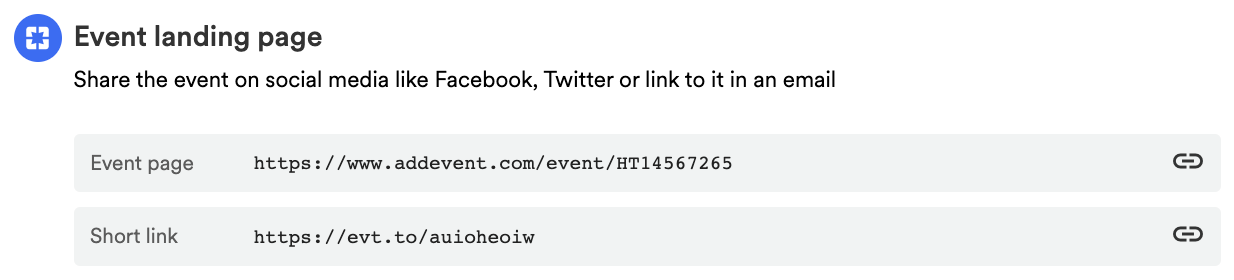
Event landing page
When you create an event, a unique landing page is automatically generated. You will be provided with two URLs, one generic and one short link. To share the event landing page, copy and paste either link. You can paste the link into an email or text message, post it on social media, or even hyperlink it in a PDF file
Add to Calendar Links
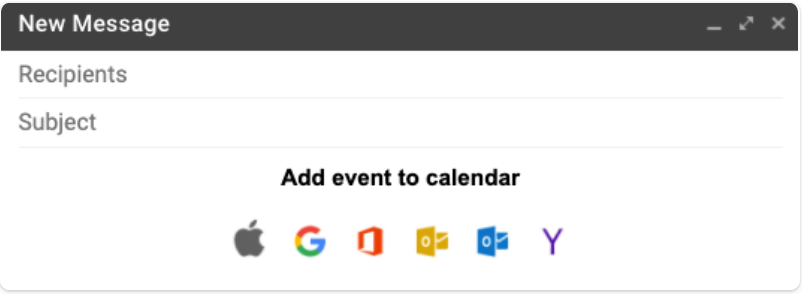
You can also share your event via add to calendar links, used in emails, newsletters, and campaigns. These links work exceptionally well with MailChimp, Marketo, Salesforce, and other campaign services. To share these add to calendar links, choose between the two styles provided and copy the text within the tile. Paste it into the content editor of your email, newsletter, or campaign (see Gmail example below). When your users click any of the links, they'll be taken directly to the calendar platform they select (unless you have enabled RSVP, but we'll save that how-to for later), and they’ll add the event to their calendar.
Add to Calendar Button
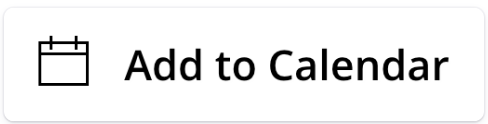
The last method you can use to share your event is the add to calendar button. The add to calendar button works perfectly in all up-to-date browsers, tablets, and mobile devices, along with Apple Calendar, Google Calendar, Outlook, Outlook.com, and Yahoo Calendar. When you include an add to calendar button on your website, you increase the likelihood that your users will add your event to their calendars by reducing the time and effort required.
Watch this tutorial!
Updated 4 months ago