Remove the Share Icon
This help doc provides step-by-step instructions on how to edit a custom template to remove the sharing icon from your calendar and event landing pages. The sharing icon allows the landing pages to be shared on social media sites.
Creating a Template
-
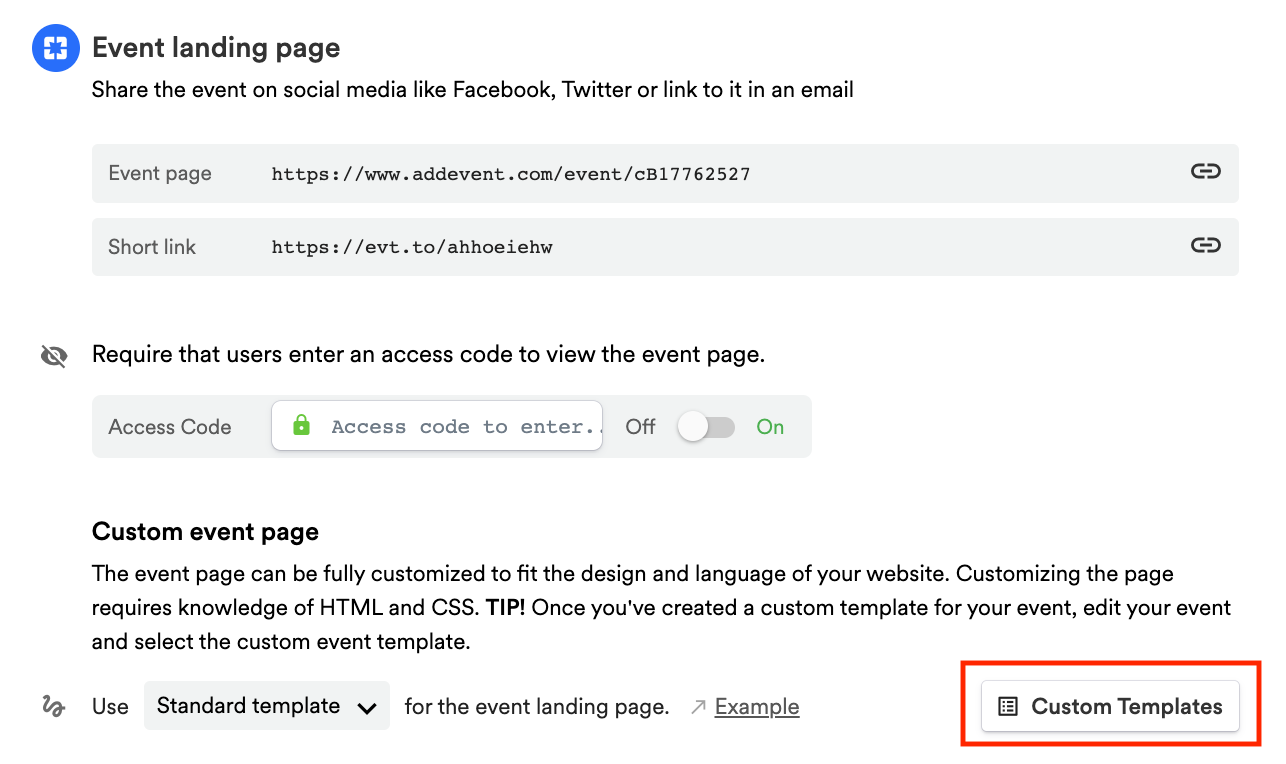
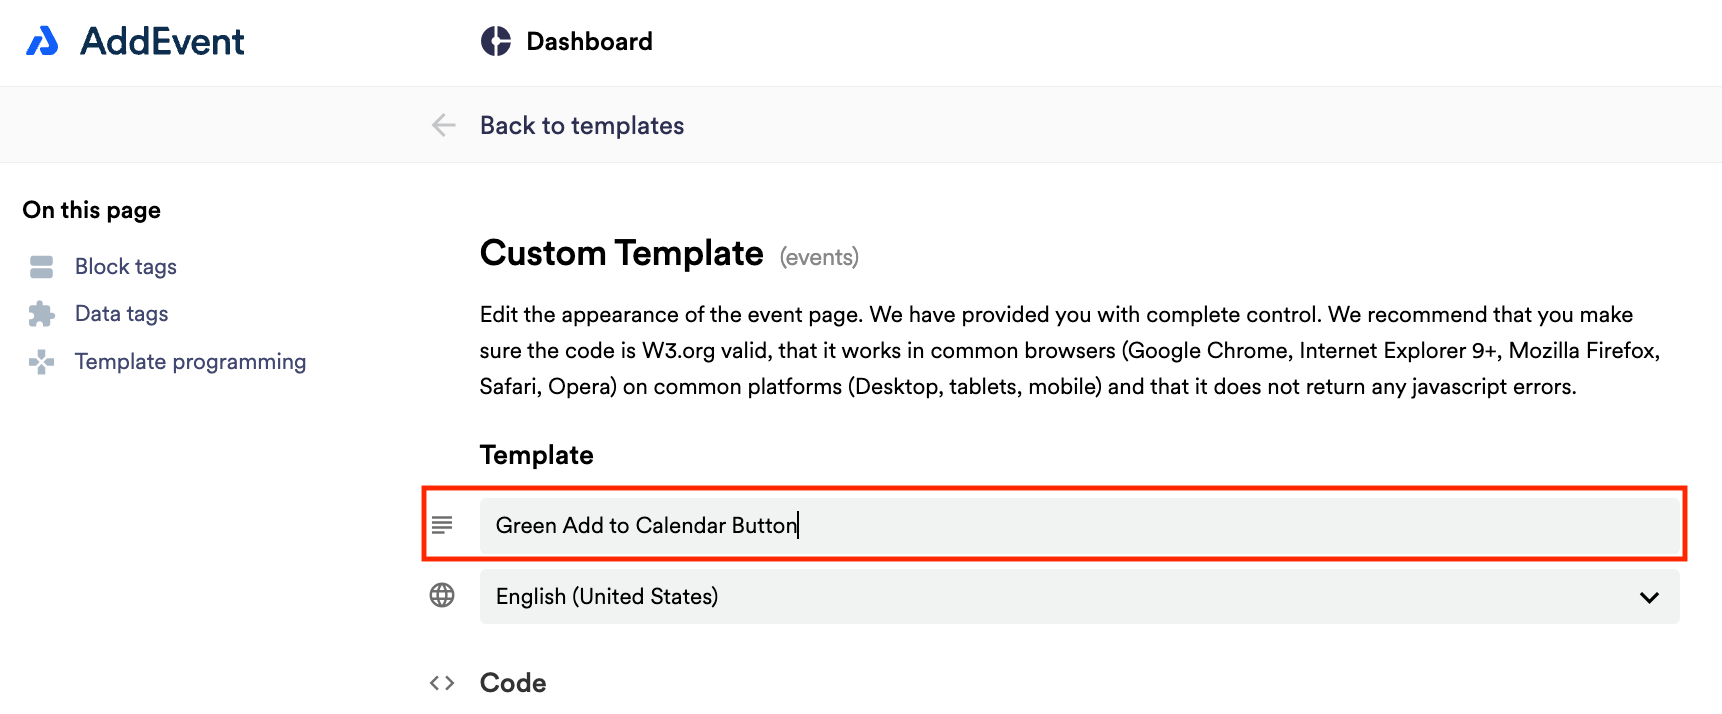
Scroll down to the first sharing method, Event landing page. Create a custom event landing page template by clicking Custom Templates in the app and clicking + New Template. Add a name for the template.
Removing the Share Icon (Calendar Landing Page Template)
-
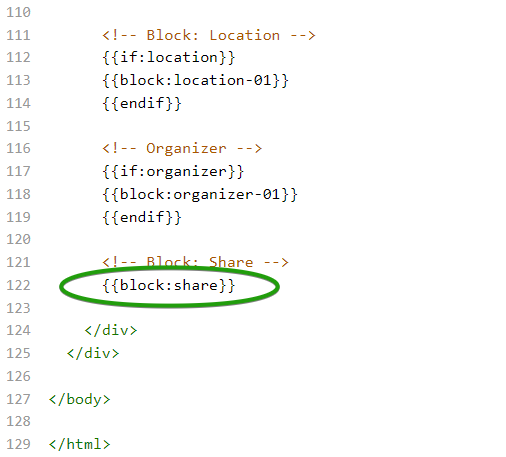
Find the following line of code and delete it:
{{block:share}}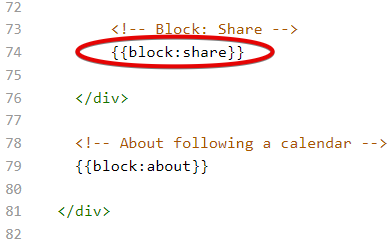
-
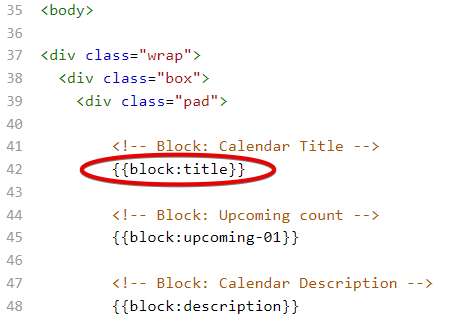
Next, you need to find the following code in the Block tag section and copy the code block
<div class="row headline"> <div class="inn"> <h1>{{title}}</h1> <!-- Share --> <div class="share"> <div class="rel"><i class="material-icons-outlined">share</i></div> </div> </div> </div> -
Replace the following line,
{{block:title}}, with the code block you just copied by pasting that code block in that line of the template
- Once the lines are removed/replaced, name your template if you haven't already and click Create or Save.
Removing the Share Icon (Event Landing Page Template)
Removing the sharing option from an event landing page only requires that you remove some code. Follow the steps below.
-
Find the following two blocks of code and remove them:
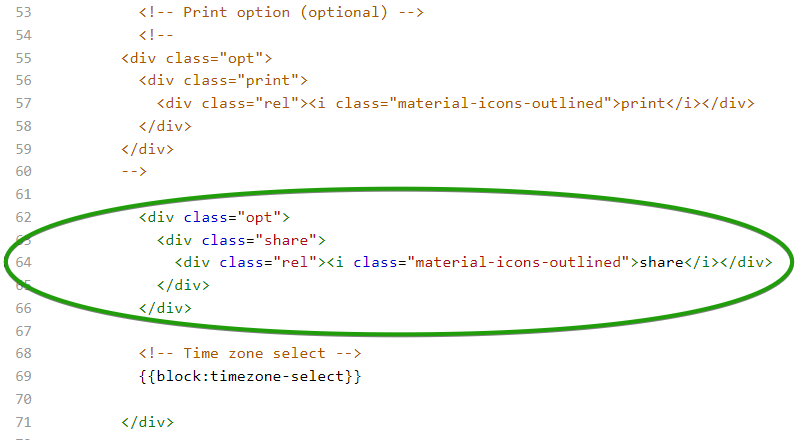
-
Once the lines are removed/replaced, name your template if you haven't already and click Create or Save.
Apply the Custom Template to the Event
-
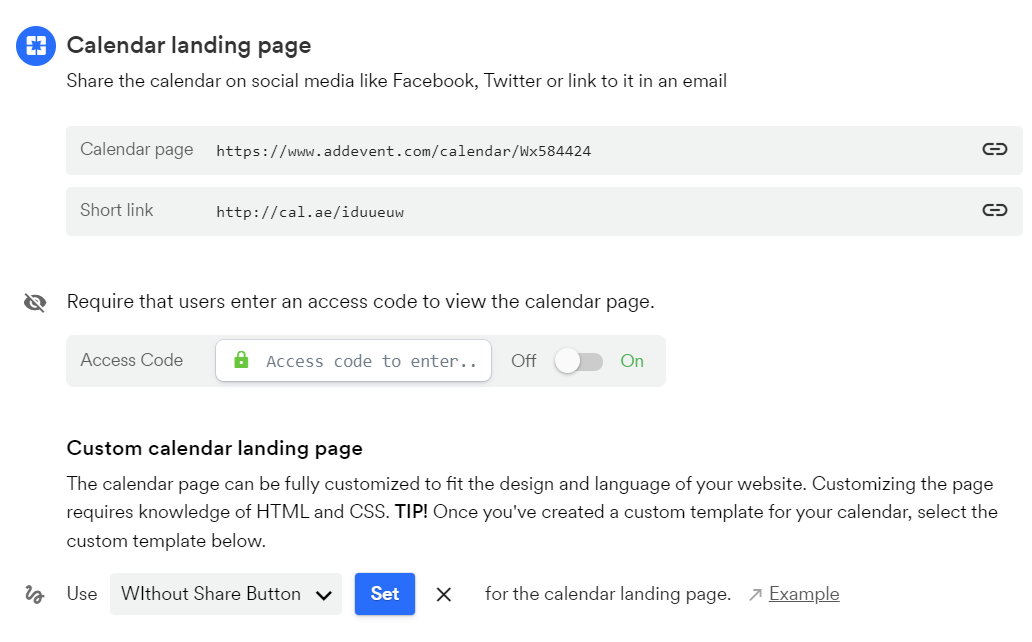
Navigate back to the calendar or event landing page, and in the landing page sharing method section, select your template from the dropdown and click Set.

-
Once the needed template is set, the share button will no longer appear on the landing pages.
Watch this tutorial!
Updated 4 months ago