How to use the dashboard

Published  January 21st, 2022  by Michael Nilsson

Explore how to use your dashboard to create and manage your events and calendars. The dashboard is your home for creating new events, managing existing events, and sharing those events with your users. It’s also where you’ll create new calendars to house your events and share multiple events at once.


Relationship between Calendars & Events

Understanding calendars and eventsYou can think of calendars as the vessels that contain events. Individual events in a calendar can be shared with end users, and entire calendars can be shared.

Calendars and events are very closely related in the AddEvent system. Every event created in the dashboard is created within a calendar. You can think of calendars as the vessels that contain events. When your AddEvent account is created, a ‘Main Calendar’ is automatically created as well. This is the default calendar that your new events are added to until you create additional calendars, at which point you’ll have the option of adding the event to any of the calendars.

Just like individual events can be shared with end users, so can entire calendars be shared. When you share a calendar with your users, they will have the ability to subscribe to the calendar. When they do this, all of your events will appear within their personal calendar applications. This provides a much more efficient method for sharing multiple events. Instead of your users needing to click 10 separate links to add 10 separate events to their personal calendars, they need only subscribe to a single calendar containing the 10 events, and they will all appear within their calendar application.

This system allows you to use calendars to organize and share different subgroups of events that may be intended for different subgroups of your users.


Creating Events

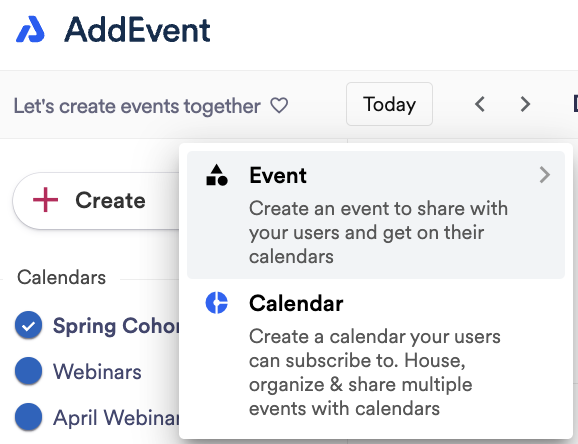
To create an event, navigate to the ‘Dashboard’ page on AddEvent.com, click the “+ Create” button, and select “Event”. You will be taken to an event creation page in which you will be able to add all of your event details.

Title of your event

This is the event title your users will see when they add it to their calendars. The best titles are succinct and informative.

Internal name of your event

Only you and account admin(s) will see the internal name of the event. This is intended to help with internal organization, for instance, if you have many different events with similar or identical titles.

Date and time + time zone

Enter the date and time at which you would like your event to begin and end. Make sure to select the appropriate time zone for the event. If you are unsure of the appropriate time zone, click the time zone box and search based upon the location of the event.

If you select the “All day” box, the time options will disappear, and you will only need to select the start and end date of the event.

Repeating events

If you have a repeating event, select the “Repeat” box. You will be presented with a popup which will prompt you to select the days of the week on which you wish the event to repeat, as well as the start and end dates of the repeating event.

If the start and end dates for the repeating event differ from the dates entered in the date and time section above, the initial dates will be overruled, and the dates specified for the repeating events will be used.

Enabling RSVP

To enable RSVP functionality for your event, check the RSVP box on the event creation page. A dropdown menu will then appear from which you can choose an RSVP form to use. You can use a custom RSVP form you have created, or you can use the “Standard RSVP” form provided by AddEvent.

Once the event has been created, you will be able to customize your RSVP settings and create a custom RSVP form if desired. More information about RSVP settings and custom RSVP forms is discussed below in the RSVP section.

You can also enable RSVP functionality for a previously created event by going to the edit event page and checking the RSVP box. Click here to read more about how editing a past event will affect your users who have already added your event to their calendar.

Description

The description of your event is part of the event itself, meaning that it will be visible when your users open the event after adding it to their calendar. It will also appear on that event’s unique landing page. (More information on landing pages is provided below.)

Location

The location where the event will take place. If the event does not have a physical location (e.g. an online webinar), feel free to leave the field blank.

Organizer and email

This is the contact person for your event. If you add an organizer and organizer email, that information will appear on the bottom of the event landing page.

Notifications

These are push notifications that are sent out by the various calendar applications. Since these are not controlled by AddEvent, they cannot be customized at all. You can choose to have the notifications sent out a certain length of time before the event starts, or to have no notifications sent at all.

Selecting an event landing page template

Each event you create has a unique landing page that is used for sharing the event. The landing page is automatically generated when the event is created. You can create custom landing pages for your events, or you can use the ‘Standard template’ landing page provided by AddEvent. On the event creation page, you can select which template you wish to use for the landing page.

Once the event has been created, you will be able to create a custom landing page template if desired. This can be done on the event page by clicking the “Custom Templates” button as shown in the image below.

More information about creating custom landing pages is discussed below in the Event Landing Pages section.

Assigning events to a calendar

The dashboard homepage always displays a calendar. The calendar displayed at any given time is determined by whichever calendar is selected on the calendar menu to the left of the dashboard. Each new event is added by default to the calendar that was displayed in the dashboard when the event was created. Within the event creation page, however, you can still choose to add the new event to any calendar you have created. Please note that the event will only be added to the single calendar it is assigned to in this setting and will not be added to multiple calendars at once.

Default/free/busy designation in calendar

When one of your users adds your event to their calendar, the time during which the event is taking place can be shown as either ‘free’ or ‘busy’ to third parties who are viewing their calendar. You can choose if that time is shown as ‘busy’ or ‘free’ on your user’s calendar, or you can simply use the default setting specified by your user in their calendar. If you’re unsure of what to choose here, we recommend leaving the setting as “use default” so your users can choose for themselves.

When you finish creating a new event and click the blue “Create” button, your event will be saved, and you will be taken to the event page.


Event Pages

Each event has an event page from which you can view the event details, manage RSVP settings and event landing pages, and share the event in various ways.

To access an event page, simply click on the desired event where it is displayed on the dashboard calendar and then click the “event page” link.


RSVP

How it works

When you enable RSVP functionality for your event, your users will be prompted to RSVP for your event before they can add it to their calendar. See example image below of an event landing page with RSVP enabled.

After clicking ‘register’, your users will be asked to indicate if they are going, and to enter their name and email address as shown below.

Custom RSVP forms

RSVP forms are fully customizable, meaning you can change both the design of the page (requires coding knowledge) and also the type and amount of information you wish to collect from your users. All information entered into RSVP forms is collected, organized, and displayed for you in your AddEvent.com account.

You can create and manage custom RSVP forms here

RSVP email notifications

You can email your users using the “Email attendees” button in the “RSVP and settings” section of the event page. You can update the subject and content of the email and choose which types of RSVP response will receive the email.

RSVP forms also have a set of automated messages and reminders built-in. When a user RSVPs for your event, they will automatically be sent a confirmation email. Then as your event gets closer, your users will automatically be sent email reminders to help increase the participation rate for your event. You can choose if and when these emails are sent, and the content and design of the emails are fully customizable.

To customize these emails, select the appropriate custom RSVP form from the list on the Custom RSVP forms. Scroll down to the “Automated messages and reminders” section, and from there you can customize and save your emails.


Sharing events

AddEvent was founded to help you get your events onto your customers’ calendars. The first step in this process is creating your events in the dashboard. The second step is sharing these events with your users so they can add your event to their calendars.

There are two ways to access the sharing options for your event. Immediately after creating a new event, you’ll be presented with the event page, which contains the event details and a list of all the sharing options for that event. You will be able to immediately use one or multiple of the different sharing methods to share your event. If you want to wait until a later point in time to share the event, you can use the “← Back to calendar” link at the top of the event page to navigate back to the dashboard.

To share an event that has already been created, you can access the event page by clicking on the event displayed on the dashboard calendar and then clicking the “event page” link.

Event Landing Pages

As explained above, each event you create has a unique landing page that is used for sharing the event. The landing page is automatically generated when the event is created and will either use our standard template or a custom template you have created (you decide this in the event creation process). You are not able to create a custom landing page during the initial event creation process. Once the event has been created, however, you can create a custom event landing page template by clicking the white “Custom Templates” button on the event’s event page, as shown in the image below.

You can then change the landing page template for your event to a different, custom template if desired by navigating back to the edit event page, updating the event template selection for the event landing page, and clicking “save.” An example of an event landing page using our Standard template is displayed below.

More documentation for custom event landing pages will be added to this section soon.

AddEvent hosts all event landing pages, and the unique URL for each event’s unique landing page is provided on the event page for that event. We provide two URLs; the first is a normal-length URL, and the second is a shortened URL for use in text messages. Both URLs will take your users to the same landing page.

You can share these URLs with your users on social media like Facebook or Twitter or include them in your emails. When your users click the links, they will be redirected to the event landing page where they can see the event details, read the event description, and add it to their calendar using an add to calendar button built into the landing page.

Add to calendar links (for emails, newsletters, and campaigns)

These links are designed specifically for use in your emails, newsletters, and campaigns. They work especially well with MailChimp, Marketo, Salesforce, and other campaign services.

When your users click any of the links, they’ll be taken to one of two places depending on if you have enabled RSVP functionality.

  • If you have not enabled RSVP functionality, when your users click one of the links in your email, they’ll be taken directly to the specific calendar service of the link they clicked. Your users will then be prompted to add your event to their calendar service with a single click. They may be asked to log in to their calendar service if they are not already logged in.
  • If you have enabled RSVP functionality, when your users click any of the links in your email, they’ll be redirected to the event landing page. There they will be able to see the event details, read the event description, RSVP for the event, and then use an add to calendar button built into the landing page to select a calendar service to which to add your event. They will then be redirected to their selected calendar service where they will be prompted to save your event. They may be asked to log in to their calendar service if they are not already logged in.

To add the add to calendar links to your email, newsletter or campaign, simply copy the text in the box and paste it into the content editor of your email, newsletter or campaign. [You can copy the text either by clicking the "Copy" button or by highlighting the text and clicking CTRL+C (Windows) or Command+C (Mac).] You can choose between Style 1, which displays the links as text, or Style 2, which displays the links as icons.

We often receive the question: "Why do I need to use add to calendar links in my emails instead of the beautiful add to calendar button that I can put on my website?"

The answer is that our add to calendar button includes JavaScript, and email vendors have decided to not allow JavaScript in emails for security reasons.

Add to calendar button (for websites and landing pages)

The add to calendar button was built specifically for use on your website and landing pages. When your users click the button, they’ll be taken to one of two places depending on if you have enabled RSVP functionality.

  • If you have not enabled RSVP functionality, when your users click the button, they will be shown a dropdown list of calendar services to choose from. They will then be redirected to the calendar service they have chosen, where they’ll be prompted to add your event to their calendar service with a single click. They may be asked to log in to their calendar service if they are not already logged in.
  • If you have enabled RSVP functionality, when your users click the button, they will still be shown a dropdown list of calendar services to choose from. Regardless of the calendar service they choose, however, they will be redirected to the calendar landing page. There they will be able to see the event details, read the event description, RSVP for the event, and then use an add to calendar button built into the landing page to select a calendar service to which to add your event. They will then be redirected to their selected calendar service where they will be prompted to save your event. They may be asked to log in to their calendar service if they are not already logged in.

To add the add to calendar button to your website or landing page, simply click the “Copy code” button to copy the source code, then add it using custom HTML options in your website or landing page system. Please note that this process requires some basic coding knowledge.

The button is fully customizable so you can restyle it to fit your website or landing page theme. While we do provide full add to calendar button API documentation, please note that this documentation is intended for the API specifically. The only portion of the add to calendar button API documentation that relates to this add to calendar button is the section on appearance customization, which can be found here.


Editing Events

To edit an event you have already created, click on the event where it is displayed on the dashboard calendar and then click the “edit” link. If you don’t see the event you are looking for, it’s possible that it is contained in a different calendar than the one currently being displayed on the dashboard, so we recommend checking your other calendars for the event.

From the event editing page, you can edit any of the event information that you wish. If you have not yet shared the event, editing the event information will have no effect on your users.

There are several important things that you should keep in mind when editing events that have already been shared with your users.

There are two main routes your users can take to add your event to their calendars.

  1. They can add the specific, individual event to their calendars

    Possible ways to do this include an event landing page, an add to calendar button on a website or landing page, add to calendar links in an email or a direct link. Remember, however, that they can only use these methods if you have chosen to share your event with them in those ways.

    Events added to their calendar using one of these methods are static, meaning that once they have been added to their calendar, they will not update if you update the event.
  2. They can follow the entire calendar in which the event is contained

    Possible ways to do this include a calendar landing page, a follow our calendar button on a website or landing page, follow our calendar links in an email, or a direct link. Remember, however, that they can only use these methods if you have chosen to share your event with them in those ways.

    All events that are added to their calendar by following your entire calendar via one of these methods are dynamic, meaning that if you update the event, the event will be updated on their personal calendars as well.

RSVPs for edited events

Editing an event for which users have already RSVP’d will not affect their RSVP status. Even if you change the date of the event, our system will still count the RSVPs received before that change as valid. However, you may wish to email your users who have RSVP’d to notify them of the change.

You can also enable RSVP functionality for events that have already been created. Please note that users who have already added your event to their calendars will not be prompted to RSVP when you do this, so your RSVP list may not include all users who have added your event to their calendar.


Creating Calendars

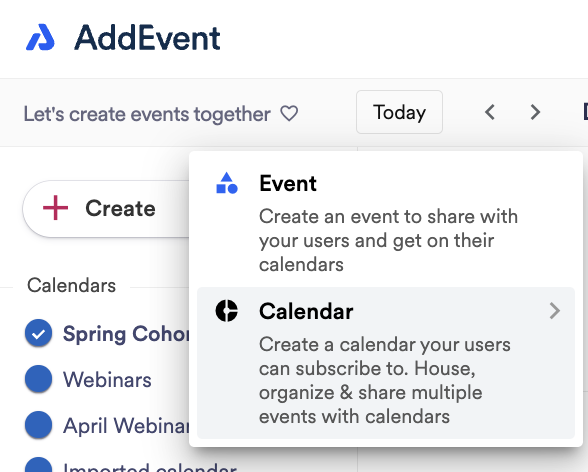
To create a calendar, navigate to the ‘Dashboard’ page on AddEvent.com, click the “+ Create” button, and select “Calendar”. You will be taken to a calendar creation page on which you will be able to add all of your calendar details.

Title of your calendar

This is the calendar title your users will see when they subscribe to your calendar. The best titles are succinct and informative.

Internal name of your calendar

Only you and account admin will see the internal name of the calendar. This is intended to help with internal organization, for instance, if you have many different calendars with similar or identical titles.

Description

This is the description of your calendar that users will see when you share this calendar’s unique landing page with them.

Default time zone

This will be the default time zone for events added to this calendar. If you are unsure of the appropriate time zone, you can click the time zone box and search based upon location.

Please note that the time zone you select is only the default for new events. Events can be changed to any time zone and a single calendar can contain multiple events with different time zones.

Selecting a calendar landing page template

Each calendar you create has a unique landing page that is used for sharing the calendar. The landing page is automatically generated when the calendar is created. You can create custom landing pages for your calendars, or you can use the ‘Standard template’ calendar landing page provided by AddEvent. On the calendar creation page, you can select which template you wish to use for the landing page.

Once the calendar has been created, you will be able to create a custom landing page template if desired. This can be done on the calendar page by clicking the “Custom Templates” button as shown in the image below.

More information about creating custom landing pages is discussed below in the Calendar Landing Pages section.

Display settings

This is the day of the week that the dashboard display for this calendar will begin on. This is currently only for your internal view and will not affect the end-user. When embeddable calendar functionality is launched in the fall of 2019, this setting will dictate the day of the week the embedded calendar will begin on, and your users will see that reflected on the embedded calendar they are viewing.

Color palette

You can create your own custom color palette or use the AddEvent default palate for event colors. These are the color options for events in the calendar and will be seen next to events on the calendar landing page and next to events displayed internally on the dashboard, as shown in the image below.

When embeddable calendar functionality is launched in the fall of 2019, these colors will appear next to the events on the embeddable calendar that your users are viewing.

Import / sync events from external calendars

Please note that you will need to have finished the initial calendar creation process and clicked “save” before this functionality will become available. To link an external calendar and sync the events contained within it to your AddEvent calendar, go to the edit page for the AddEvent calendar and click the “Add external calendar” link as shown in the image below.

When you click the link, you will be prompted to paste in the URL to the external calendar you wish to import. In order to import an external calendar, it must be a valid iCalendar (.ics). Once added, your events from the external calendar will be synced with this calendar every 12 hours. The events will be visible in this calendar and to this calendar’s subscribers, but they will not be editable using AddEvent.

Subscriber settings

When you share a calendar with your users, you can decide to either allow them to subscribe to your calendar anonymously or to collect information from them via a form they are presented with before they are able to subscribe.

  • If you do not want to collect information from your users before they can subscribe to your calendar, simply check the “Nothing” option during the calendar creation process, as shown in the image below.

  • If you do wish to collect information from your users before they are able to subscribe, check the “I would like to know box.” Please note that we do not currently support optional information forms for your users. If you display an information form, the add to calendar button will not be displayed until after your user has completed the form.

If you decide to collect information from your users, you will then need to decide what information to collect. By default, we’ve added “Name” and “Email”, but you can customize the form they are presented with by adding an unlimited number of custom input fields. You will need to enter the name and input type (text, number, date, etc.) for each additional field you add. We recommend that you keep the data collection short and to the point.

By default, we always collect the following data (if available): IP address, city, postal code, state, country, GEO location (latitude, longitude). This is in strict compliance with data collection and GDPR requirements.

When you finish creating a new calendar and click the blue “Create” button, your calendar will be saved, and you’ll be redirected back to the dashboard so you can start adding events to your new calendar


Adding Events to Calendars

The dashboard always displays a calendar, whether it’s the Main Calendar that is automatically created for you, or one of the calendars you have created. To add an event to a specific calendar, select the desired calendar from the list of calendars on the left-hand side of the dashboard beneath the “+ Create” button, as shown in the image below. This will ensure that the calendar you wish to add an event to is being displayed on the dashboard.
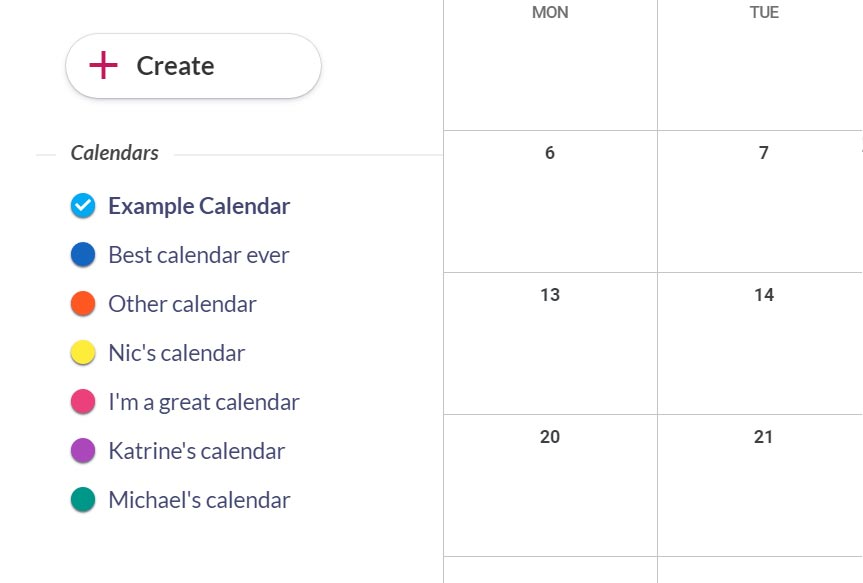
Once your desired calendar is being displayed, simply click the “+ Create” button, and select “Event.” You will be taken to an event creation page in which you will be able to add all of your event details. For a detailed guide to creating events, please visit the Creating Events docs page.

Title of your calendar

This is the calendar title your users will see when they subscribe to your calendar. The best titles are succinct and informative.


Calendar Pages

Each calendar has a calendar page from which you can view the calendar details and subscriber information (if data collection is enabled), manage your calendar landing page, and share the calendar in various ways.

You can access the unique calendar page for any calendar from the list of calendars on the left-hand side of the dashboard. Simply hover your mouse over the desired calendar, click the three dots, and select the “Settings and sharing” link.

Subscribers

The Subscribers section will display data that is collected by default for all users who have subscribed to the particular calendar you are viewing. If you have chosen to collect information from your subscribers when they sign up, this data will be displayed in this section in addition to the default information. (You can enable or disable the ability to collect additional information from your subscribers on the edit calendar page.)

As shown in the image below, information for all current (active) and past (inactive) calendar subscribers will be displayed. This information includes all data that we automatically collect, as well as the data provided by your subscribers via the form they were prompted to fill out before subscribing.

You will be able to filter your subscribers by active, inactive, or blocked subscribers, and you can download a .csv file with all subscriber data by clicking the white “All subscribers” button, then clicking “download.”


Sharing calendars

AddEvent was founded to help you get your events onto your customers’ calendars. The first way to do this, as discussed Sharing Events section, is by sharing individual events with your users so they can add your events to their calendars. The second way is by sharing entire calendars with your users.

When you share a calendar with your users, they will have the ability to subscribe to (or follow) the calendar. When they do this, all of the events contained in that calendar will appear within their personal calendars at once. This provides a much more efficient method for sharing multiple events. Instead of your users needing to click 10 separate links to add 10 separate events to their personal calendars, they need only subscribe to a single calendar containing the 10 events, and they will all appear on their calendar.

Each calendar has its own calendar page, and the different ways to share that calendar are all contained on that calendar page. You can access the unique calendar page for any calendar from the list of calendars on the left-hand side of the dashboard. Simply hover your mouse over the desired calendar, click the three dots, and select the “Settings and sharing” link.

Calendar landing pages

As explained above, each calendar you create has a unique landing page that is used for sharing the calendar. The landing page is automatically generated when the calendar is created and will either use our standard template or a custom template you have created (you decide this in the calendar creation process.) You are not able to create a custom landing page during the initial calendar creation process. Once the calendar has been created, however, you can create a custom calendar landing page template by clicking the white “Custom Templates” button on the calendar’s calendar page, as shown in the image below.

You can then change the landing page template for your calendar to a different, custom template if desired by navigating back to the edit calendar page, updating the calendar template selection for the calendar landing page, and clicking “save.” An example of a calendar landing page using our Standard template is displayed below.

More documentation for custom calendar landing page creation will be added to this section soon.

AddEvent hosts all calendar landing pages, and the unique URL for each calendar’s unique landing page is provided on the calendar page for that calendar. We provide two URLs; the first is a normal-length URL, and the second is a shortened URL for use in text messages. Both URLs will take your users to the same landing page.

You can share these URLs with your users on social media like Facebook or Twitter or include them in your emails. When your users click the links, they will be redirected to the calendar landing page where they can see the calendar details, read the calendar description, and subscribe to the calendar using an add to calendar button built into the landing page.

Add to calendar links (for emails, newsletters, and campaigns)

These links were built specifically for use in your emails, newsletters, and campaigns. They work especially well with MailChimp, Marketo, Salesforce, and other campaign services.

When your users click any of the links, they’ll be taken to one of two places depending on if you have decided to collect information from them.

  • If you have not chosen to collect information from your users before they can subscribe to your calendar, when they click one of the links in your email, they’ll be taken directly to the specific calendar service of the link they clicked. Your users will then be prompted to add your calendar (and all of the events contained within it) to their calendar service with a single click. They may be asked to login to their calendar service if they are not already logged in.
  • If you have chosen to collect information from your users before they can subscribe to your calendar, when they click any of the links in your email, they’ll be redirected to the calendar landing page. There they will be able to see the calendar details, read the calendar description, fill in the information you’ve requested, and then use an add to calendar button built into the landing page to select a calendar service to which to add your calendar. They will then be redirected to their selected calendar service where they will be prompted to add your calendar (and all of the events contained within it) to their calendar service with a single click. They may be asked to login to their calendar service if they are not already logged in.

To add the add to calendar links to your email, newsletter or campaign, simply copy the text in the box and paste it into the content editor of your email, newsletter or campaign. [You can copy the text either by clicking the "Copy" button or by highlighting the text and clicking CTRL+C (Windows) or Command+C (Mac).] You can choose between Style 1, which displays the links as text, or Style 2, which displays the links as icons.

We often receive the question: "Why do I need to use add to calendar links in my emails instead of the beautiful add to calendar button that I can put on my website?"

The answer is that our add to calendar button includes JavaScript, and email vendors have decided to not allow JavaScript in emails for security reasons.

Add to calendar button

The add to calendar button was built specifically for use on your website and landing pages.

When your users click the button, they’ll be taken to one of two places depending on if you have decided to collect information from them.

  • If you have not chosen to collect information from your users before they can subscribe to your calendar, when they click the button, they will be shown a dropdown list of calendar services to choose from. They will then be redirected to the calendar service they have chosen, where they’ll be prompted to add your calendar (and all of the events contained within it) to their calendar service with a single click. They may be asked to login to their calendar service if they are not already logged in.
  • If you have chosen to collect information from your users before they can subscribe to your calendar, when your users click the button, they will still be shown a dropdown list of calendar services to choose from. Regardless of the service they choose, however, they will be redirected to the calendar landing page. There they will be able to see the calendar details, read the calendar description, fill in the information you’ve requested, and then use an add to calendar button built into the landing page to select a calendar service to which to add your calendar. They will then be redirected to their selected calendar service where they will be prompted to add your calendar (and all of the events contained within it) to their calendar service with a single click. They may be asked to login to their calendar service if they are not already logged in.

To add the add to calendar button to your website or landing page, simply click the “Copy code” button to copy the source code, then add it using custom HTML options in your website or landing page system. Please note that this process requires some basic coding knowledge.

The button is fully customizable so you can restyle it to fit your website or landing page theme. While we do provide full add to calendar button API documentation, please note that this documentation is intended for the API specifically. The only portion of the add to calendar button API documentation that relates to this add to calendar button is the section on appearance customization, which can be found here.


Editing Calendars

You can access the edit page for any calendar from the list of calendars on the left-hand side of the dashboard. Simply hover your mouse over the desired calendar, click the three dots, and select the “Edit calendar” link.

From the edit calendar page, you can edit any of the calendar information that you wish. Calendars are dynamic, so if you change the Title or color palette of the calendar, those changes will be reflected both on the calendars of new subscribers, and on the calendars of your users who had already subscribed before the change was made.

If you change the calendar landing page template, the calendar description (displayed on the landing page), or the information you choose to collect from your subscribers, these changes will only impact new users who subscribe to your calendar, and not those who have already subscribed. This means that if you add an additional question to your information collection form that must be completed by new subscribers, you will only have answers to that question from users who subscribed to your calendar after the question was added.

Remember that since calendars are dynamic, all events that are added to your users’ calendars by subscribing to your calendar are also dynamic (as opposed to events that are added individually and not through a calendar subscription). This means that if you update one of these events, the event will automatically be updated on your users’ calendars as well.

Related articles